
Whether you’re a DIY enthusiast or a homeowner faced with a stubborn lock, knowing how to remove a lock from a door can be a handy skill. This process, while seemingly daunting, can be broken down into manageable steps that even a novice can follow. In this guide, we’ll walk you through the process, providing clear instructions and helpful tips along the way.
Understanding the Types of Door Locks
Before we delve into the removal process, it’s important to understand the different types of door locks you might encounter. This knowledge can help you approach the task with the right tools and techniques.
The most common types of door locks include:
- Deadbolts: These are typically found on external doors and are known for their high level of security.
- Knob locks: Often used in interior doors, these locks are integrated into the door knob itself.
- Lever-handle locks: Similar to knob locks, these are commonly used in commercial settings due to their ease of use.
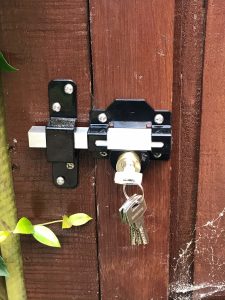
- Mortise locks: A sturdy option often found in older homes, these locks require a pocket – the mortise – to be cut into the door where the lock is fitted.
Each of these locks has a different structure and mechanism, which means the removal process can vary. However, the basic principles remain the same.
Tools You’ll Need
Before you begin, gather the necessary tools. Having the right tools at hand can make the process smoother and prevent damage to the door or lock.
Here’s what you’ll typically need:
- A screwdriver: This is the most essential tool. A Phillips-head screwdriver is commonly used, but some locks may require a flat-head screwdriver.
- A small hammer: This can be useful for gently tapping out stubborn components.
- A pair of needle-nose pliers: These can help remove small parts or hold screws in place.
- A small, thin piece of metal or a straightened paperclip: This can be used to depress a detent (a small button or spring-loaded pin) if your lock has one.
Remember, it’s important to use the right tool for each task to avoid causing damage.
Steps to Remove a Door Lock
Step 1: Locate the Screws
The first step in removing a door lock is to locate the screws. These are usually found on the interior side of the door. In some cases, they may be hidden under a decorative cover or require a detent to be depressed to access them.
Once you’ve located the screws, use your screwdriver to remove them. Be sure to keep the screws in a safe place as you’ll need them to install the new lock.
Step 2: Remove the Knob or Handle
With the screws removed, you should be able to pull the knob or handle off the door. If it’s stuck, gently tap it with your hammer to loosen it. Remember to hold the other side of the knob or handle to prevent it from falling.
Once the knob or handle is removed, you’ll be able to see the lock mechanism. This is usually a cylindrical piece of metal that extends into the door.
Step 3: Remove the Lock Mechanism
To remove the lock mechanism, you’ll need to unscrew any additional screws holding it in place. Once these are removed, you should be able to pull the mechanism out of the door. Again, if it’s stuck, use your hammer to gently tap it out.
With the lock mechanism removed, the lock is effectively off the door. All that’s left is to remove the strike plate, which is the metal plate attached to the door frame where the lock bolt enters.
Step 4: Remove the Strike Plate
The strike plate is usually held in place by two screws. Simply unscrew these and pull the plate off the door frame. With this final step, you’ve successfully removed the lock from the door.
Installing a New Lock
Once you’ve removed the old lock, you may wish to install a new one. This process is essentially the reverse of removal. Start by inserting the new lock mechanism into the door, followed by the knob or handle. Secure everything with screws, and finally, attach the new strike plate to the door frame.
Remember to test the new lock several times to ensure it’s working correctly. If it’s not, you may need to adjust the position of the strike plate or check that all components are properly aligned.
Final Thoughts
Removing a lock from a door doesn’t have to be a daunting task. With the right tools and a bit of patience, you can easily handle this DIY project. Remember to work slowly and carefully to avoid damaging the door or lock. And if you encounter any difficulties, don’t hesitate to seek professional help.
Whether you’re upgrading your locks for security reasons or simply replacing a worn-out lock, this guide should provide you with the knowledge and confidence you need to tackle the task. Happy DIY-ing!